Manage access to an existing Custom Agent
Last updated: July 28, 2026
View all users with access to Custom Agent
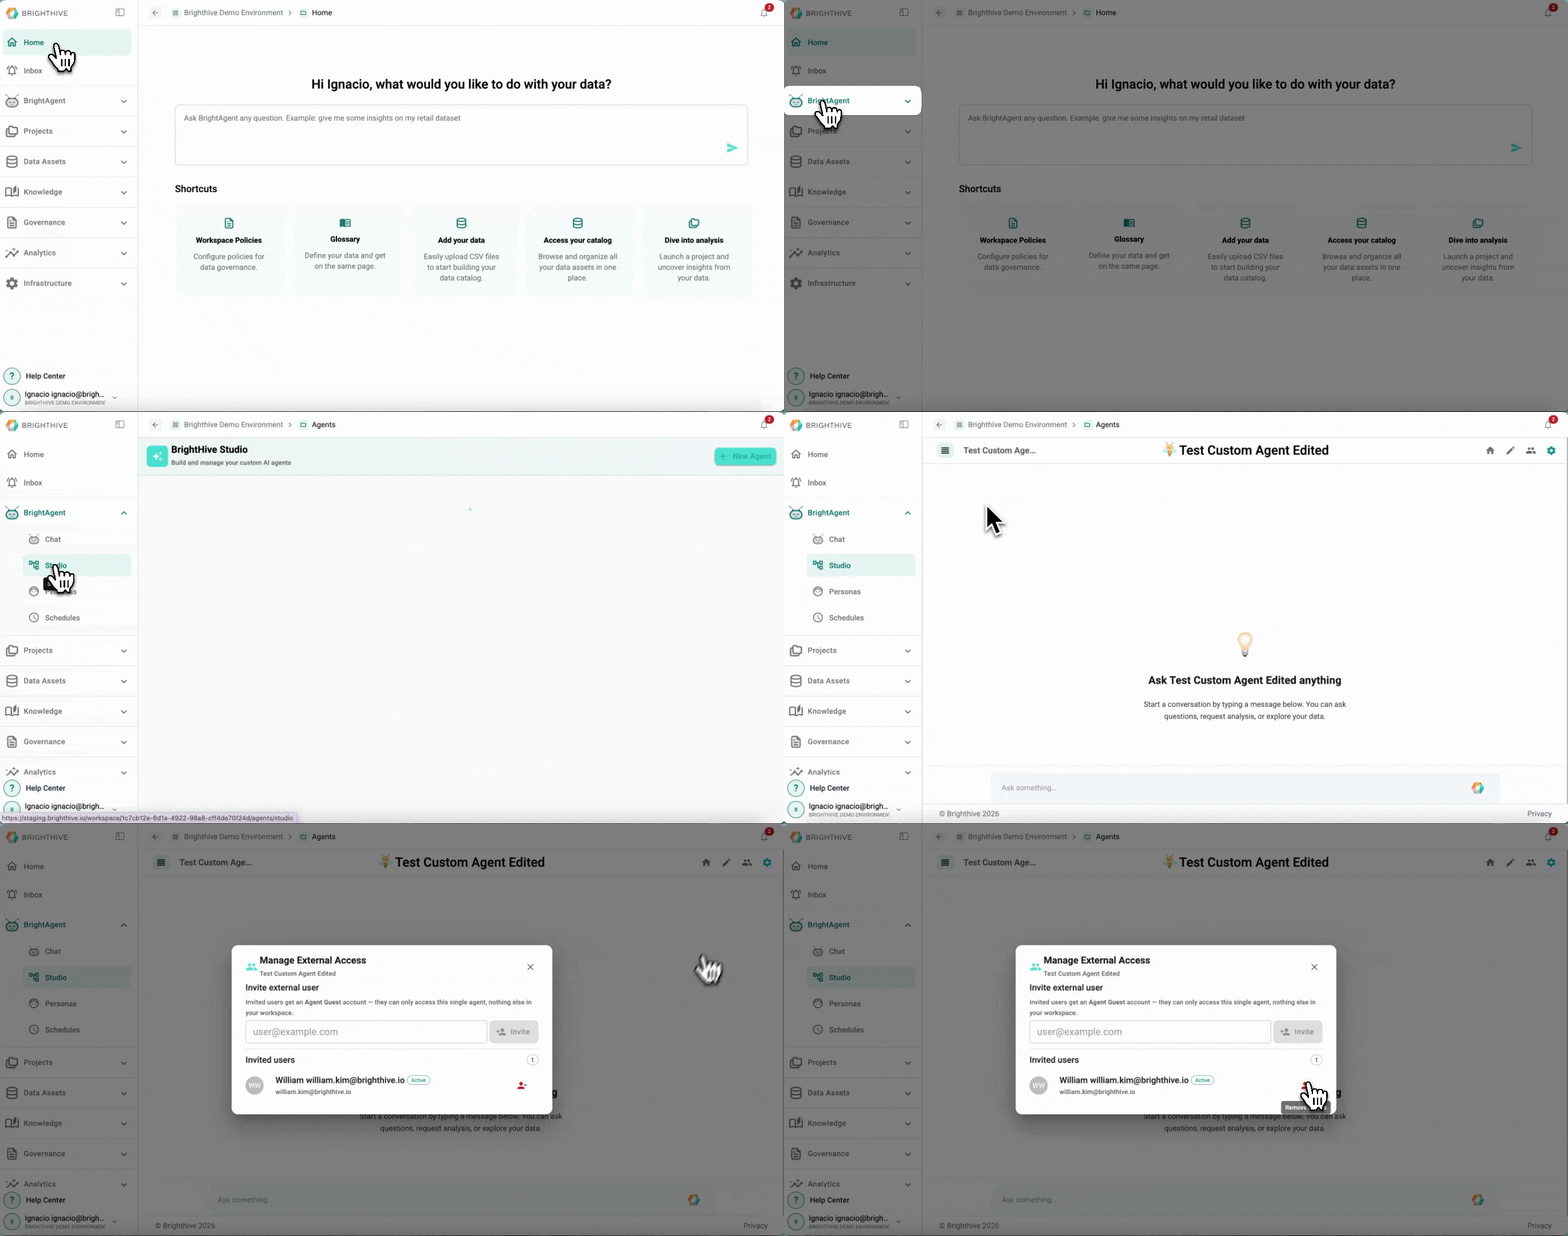
To view users with access to an existing Custom Agent:
Click "BrightAgent" on the left side of the platform
Click "Studio" on the list of options deployed
Select the name of the Custom Agent you wish to view access
On the top-right corner, select the people icon
On the popup window, you will see all users with access to the Custom Agent
Share access to Custom Agent
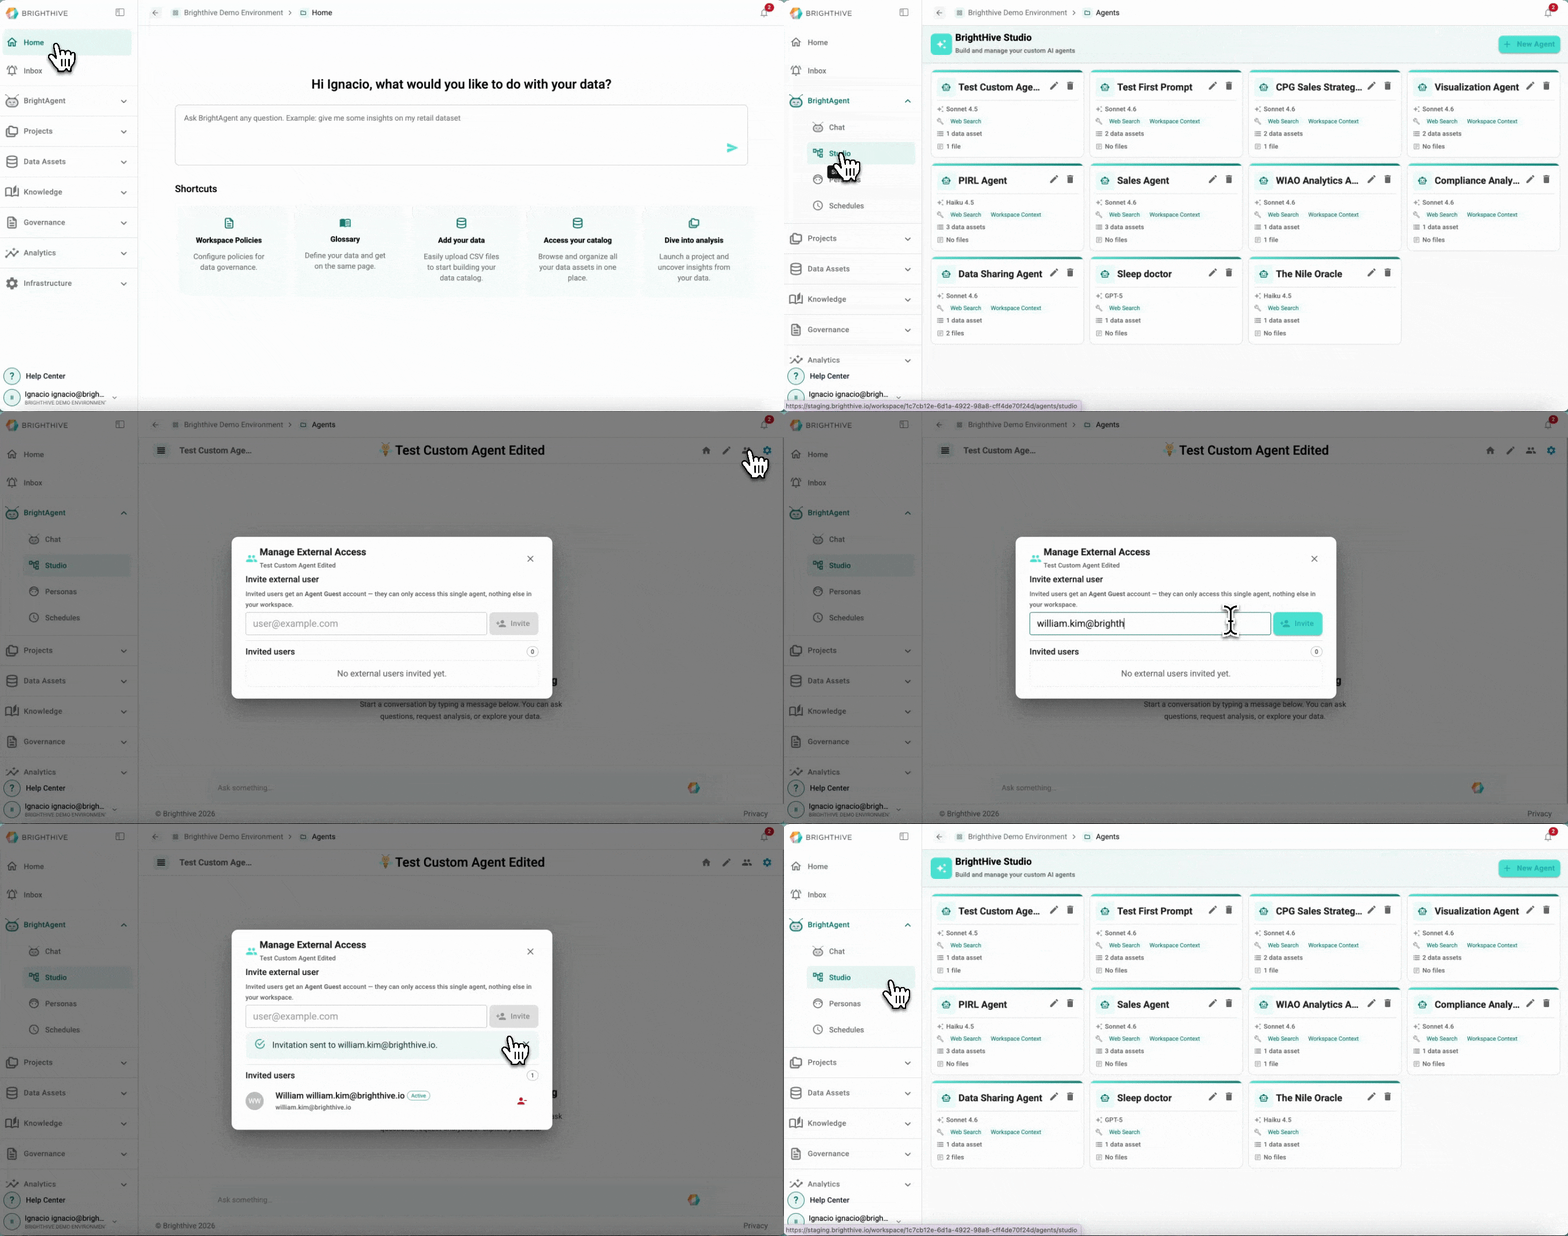
Once a Custom Agent has been created you can share access to it to persons outside of your Workspace. Their access will be limited to the Custom Agent and the Data linked to it.
To share access to an existing Custom Agent:
Click "BrightAgent" on the left side of the platform
Click "Studio" on the list of options deployed
Select the name of the Custom Agent you wish to share
On the top-right corner, select the people icon
On the popup window, type the email of the people to share the Custom Agent with
Confirm the invitation by clicking "Invite"
Remove access to Custom Agent
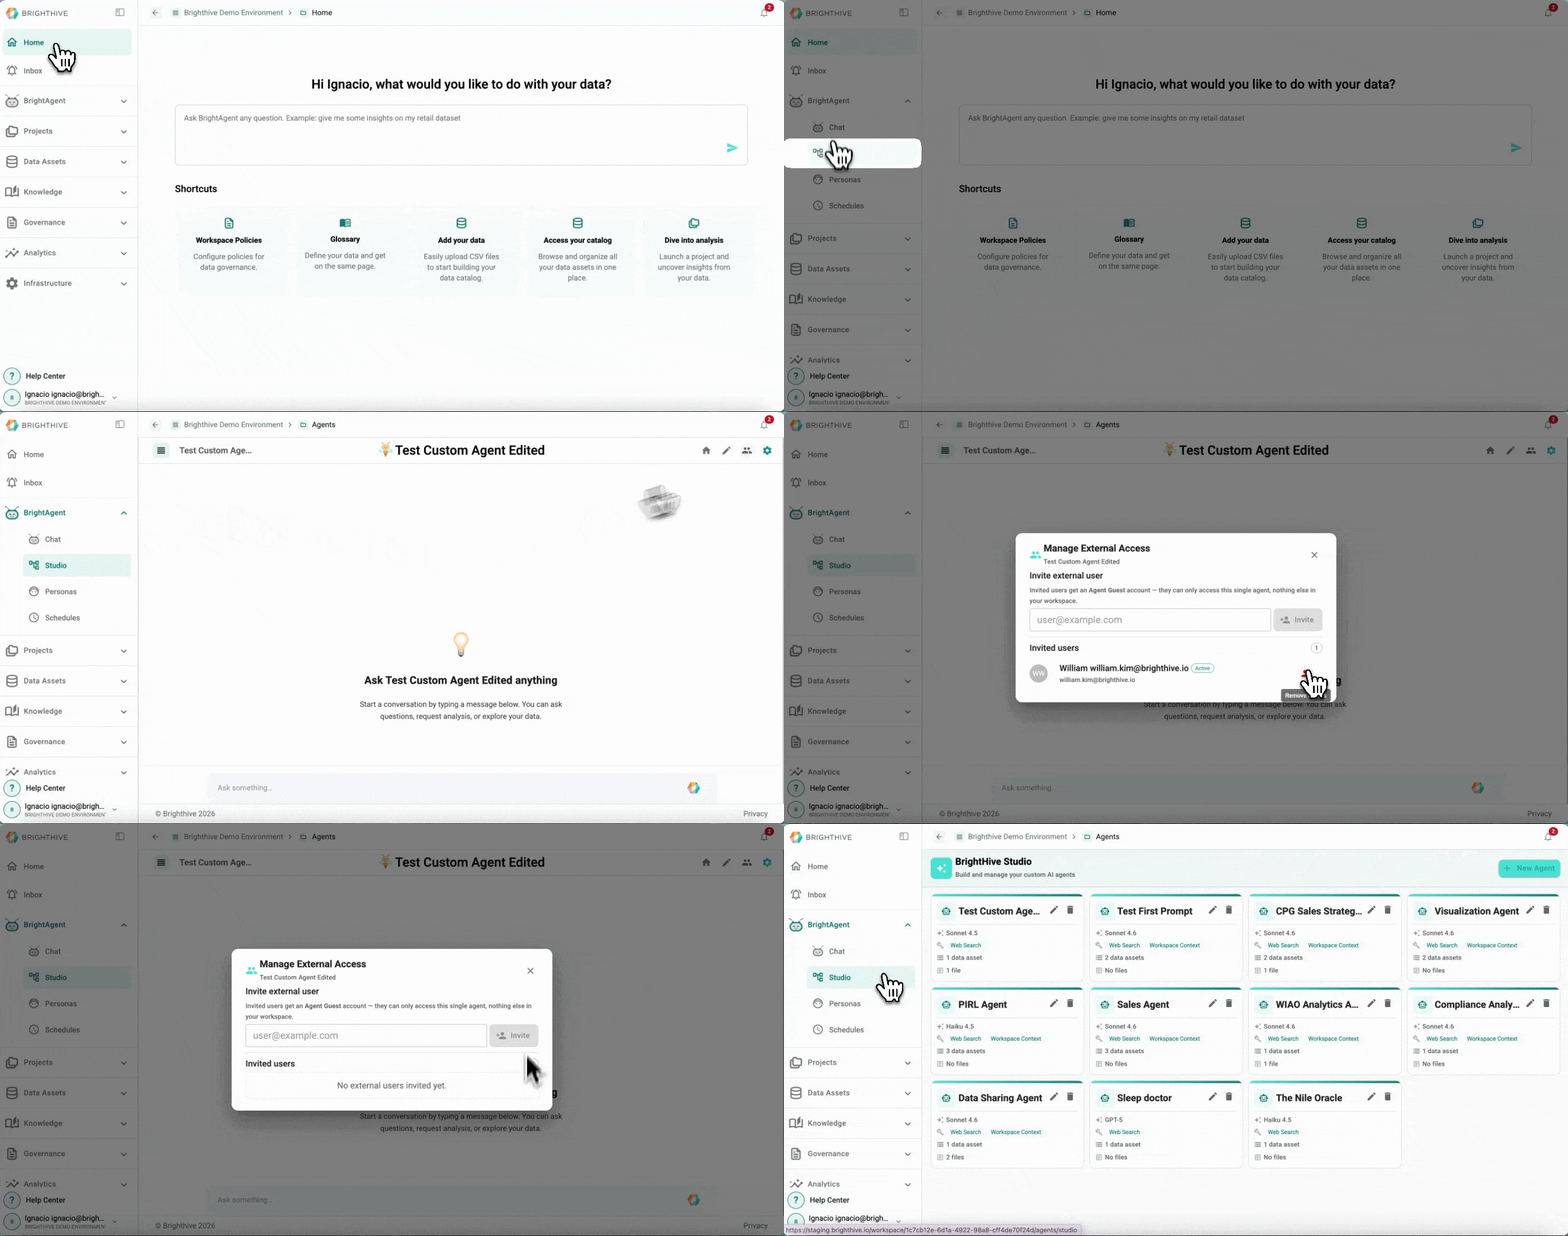
To remove an user's access to an existing Custom Agent:
Click "BrightAgent" on the left side of the platform
Click "Studio" on the list of options deployed
Select the name of the Custom Agent you wish to share
On the top-right corner, select the people icon
On the popup window, select the remove icon next to the user's email you wish to remove