Setting up Project Flow
Last updated: April 2, 2025
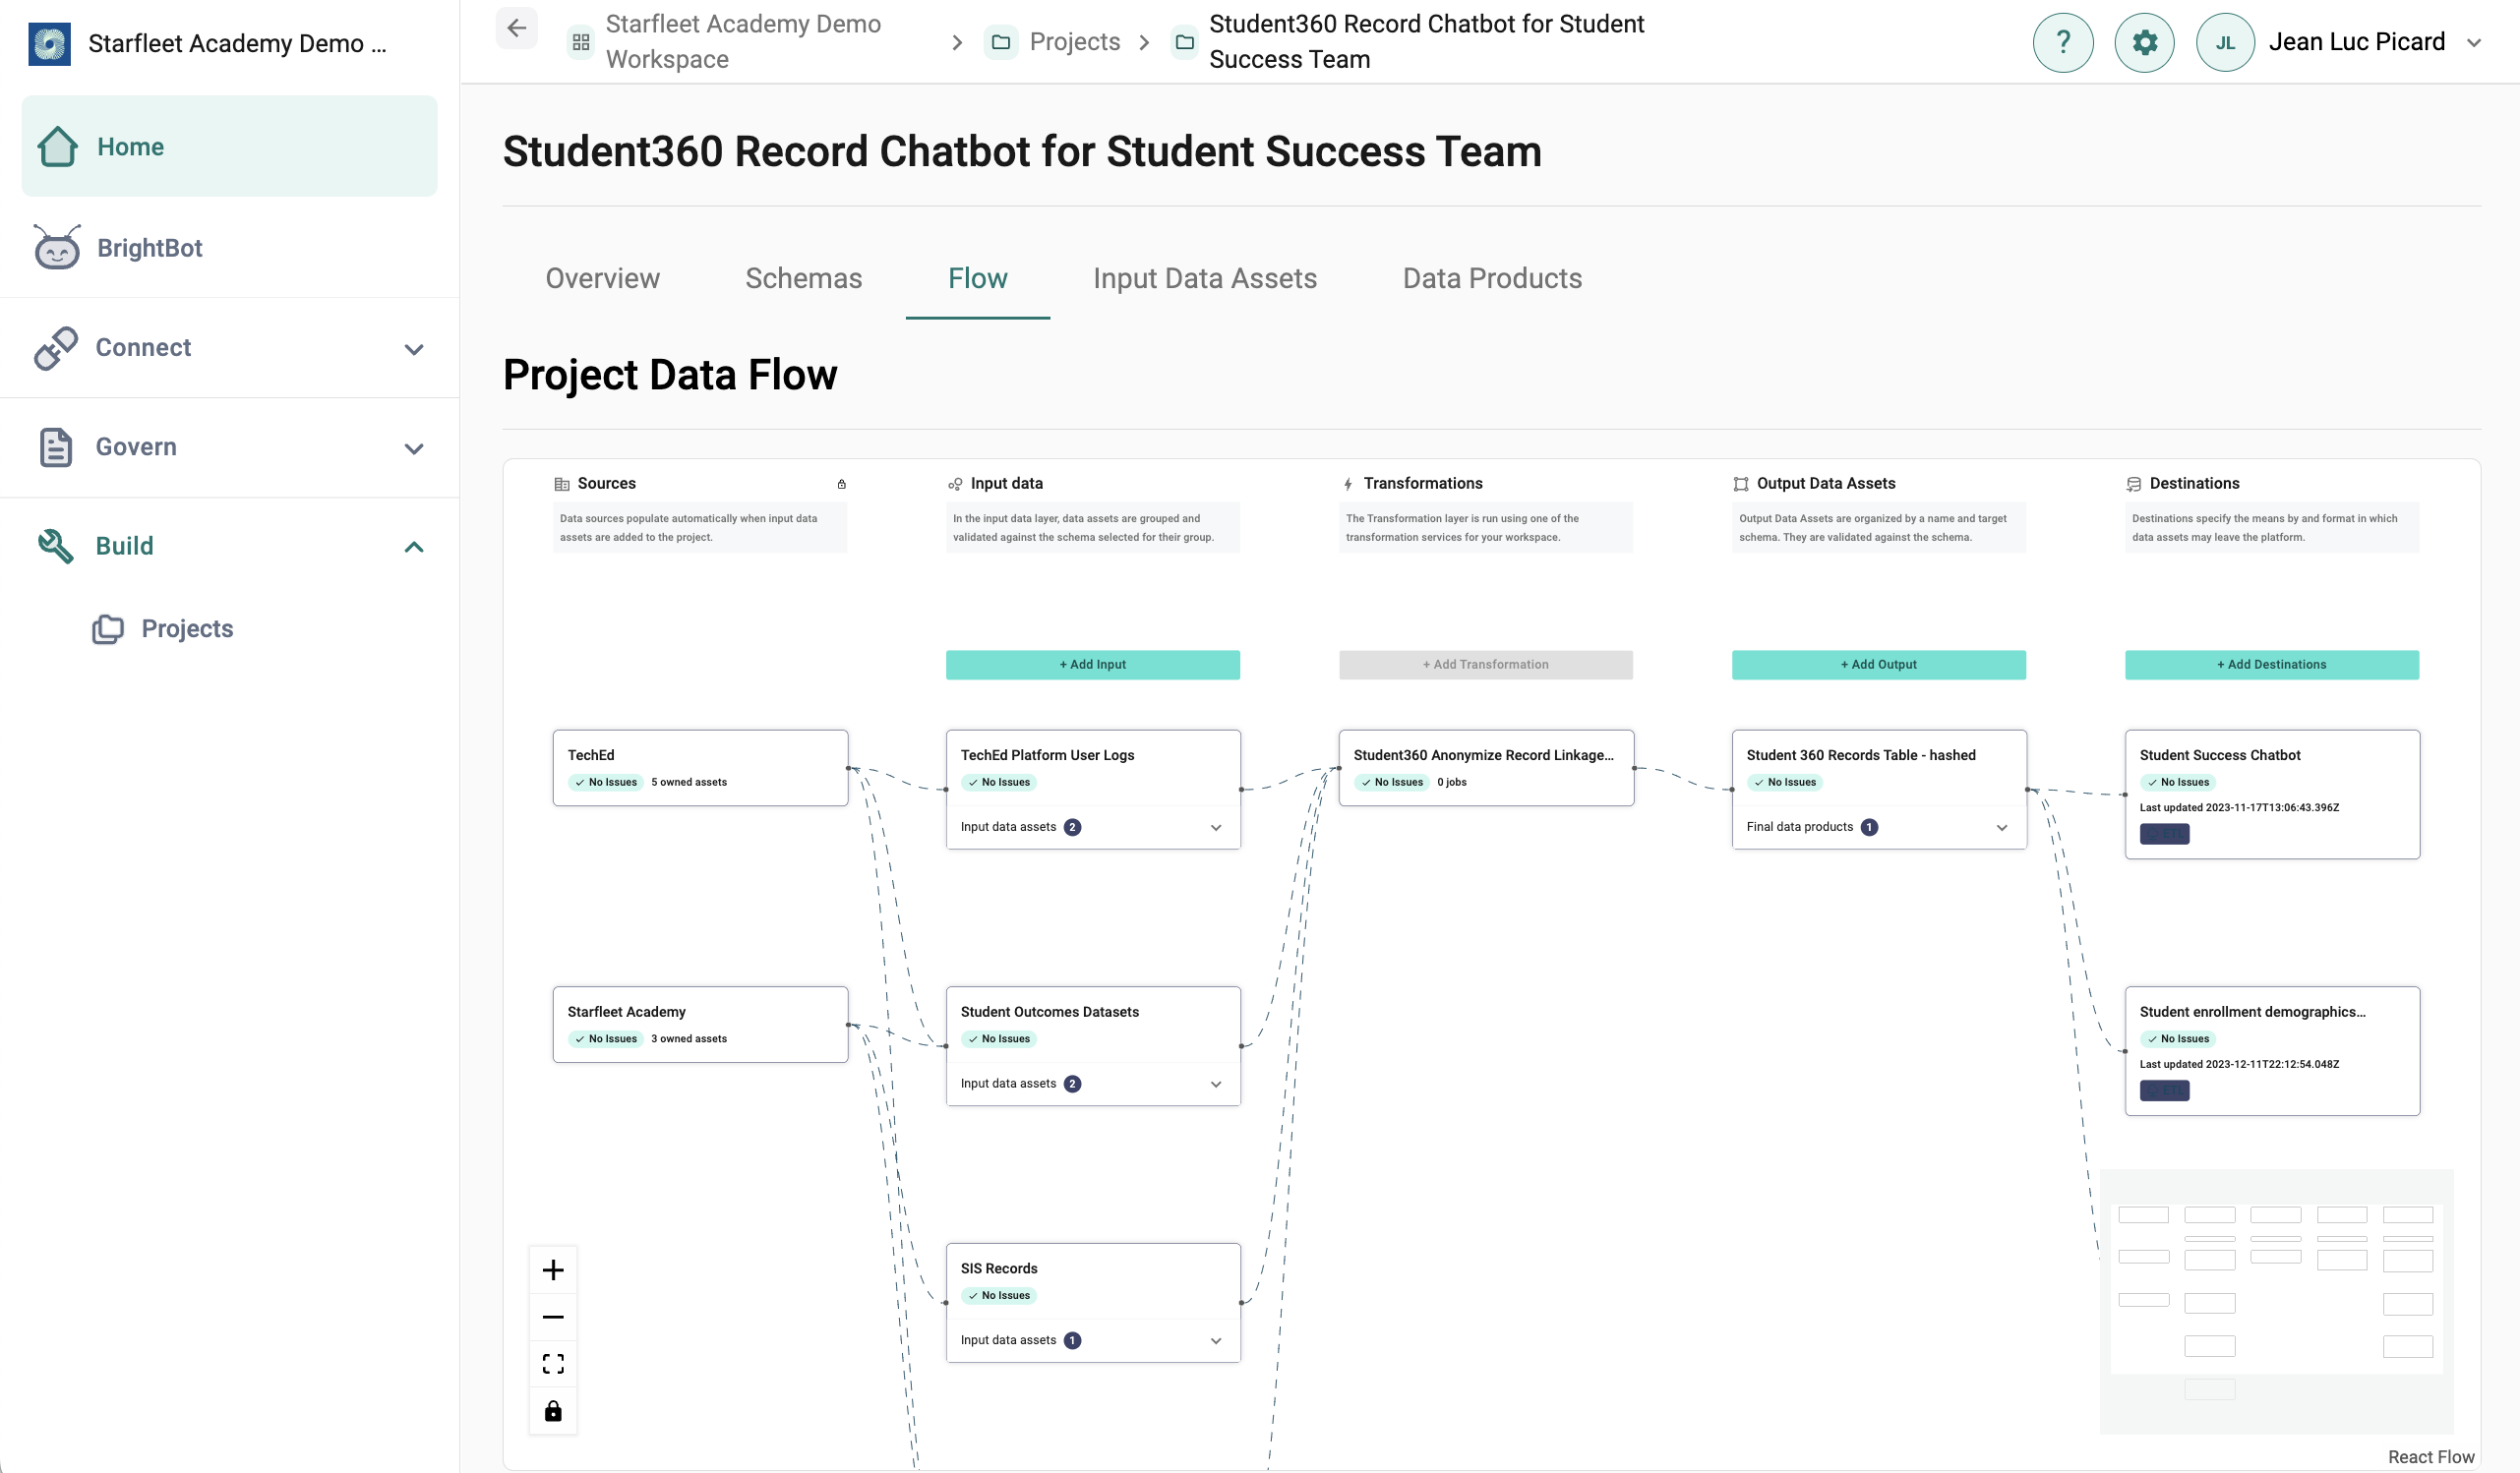
The Project Flow is a technical overview of a project's final data product production. It is intended to help the user understand how data connects to produce the final product and identify the issues at any point along any path.
The Project Flow includes the following steps:
- Sources: Pre-populated by the platform after data assets are added, Sources shows which data stacks different data assets are being pulled from.
-
Input Data: By selecting "Add Input", users will be prompted to first create an Input Data Asset Group. Grouping data assets can help users organize the types of information that are being utilized in a project, and are especially helpful when using similar files from different organizations or business units.
- Input Data Assets can be validated against a Schema, to ensure that the data is structured in a usable format. Users can select a schema from the Project Library, or upload a JSON schema directly into the project.
- Once an Input Data Asset Group has been defined, add data assets by selecting the "Input data assets" drop down under the new asset group name.
- Transformations: Once data assets are selected, users can transform their data using Brighthive-managed DBT Cloud. Transformations can be useful for tasks like hashing, aggregation, and anonymization. To learn more about transformations, see Building Data Products.
- Output Data: By selecting "Add Output", users will be prompted to create an Output Data Asset Group, which can additionally be validated against a Schema from the Project Library.
-
Destinations: Destinations specify the means and format in which data can leave the Brighthive platform. All destinations require users to input a name, description, and select destination method. Destination methods include:
- Download: Choose between .csv, .json,. or .parquet file formats
- API Connect: Create a URL endpoint to use for your applications